How to set up Wi-Fi in Ubuntu in 1 minute!
STEP ONE:
Setting up a Wi-Fi connection in Ubuntu Linux is a very simple procedure.
Follow the instructions below.
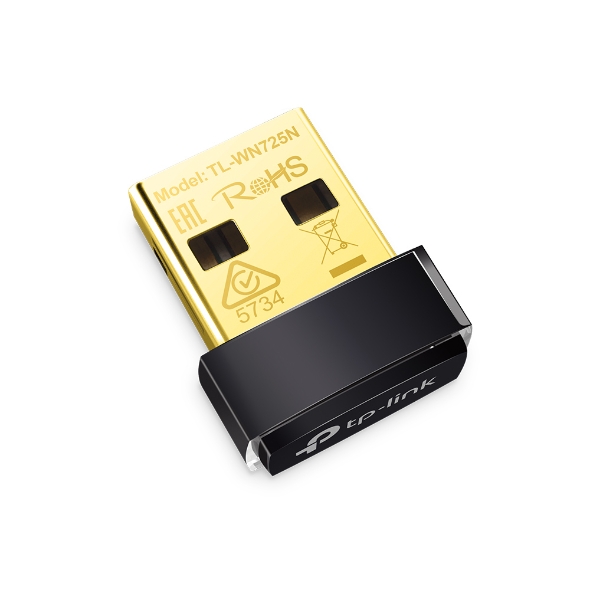
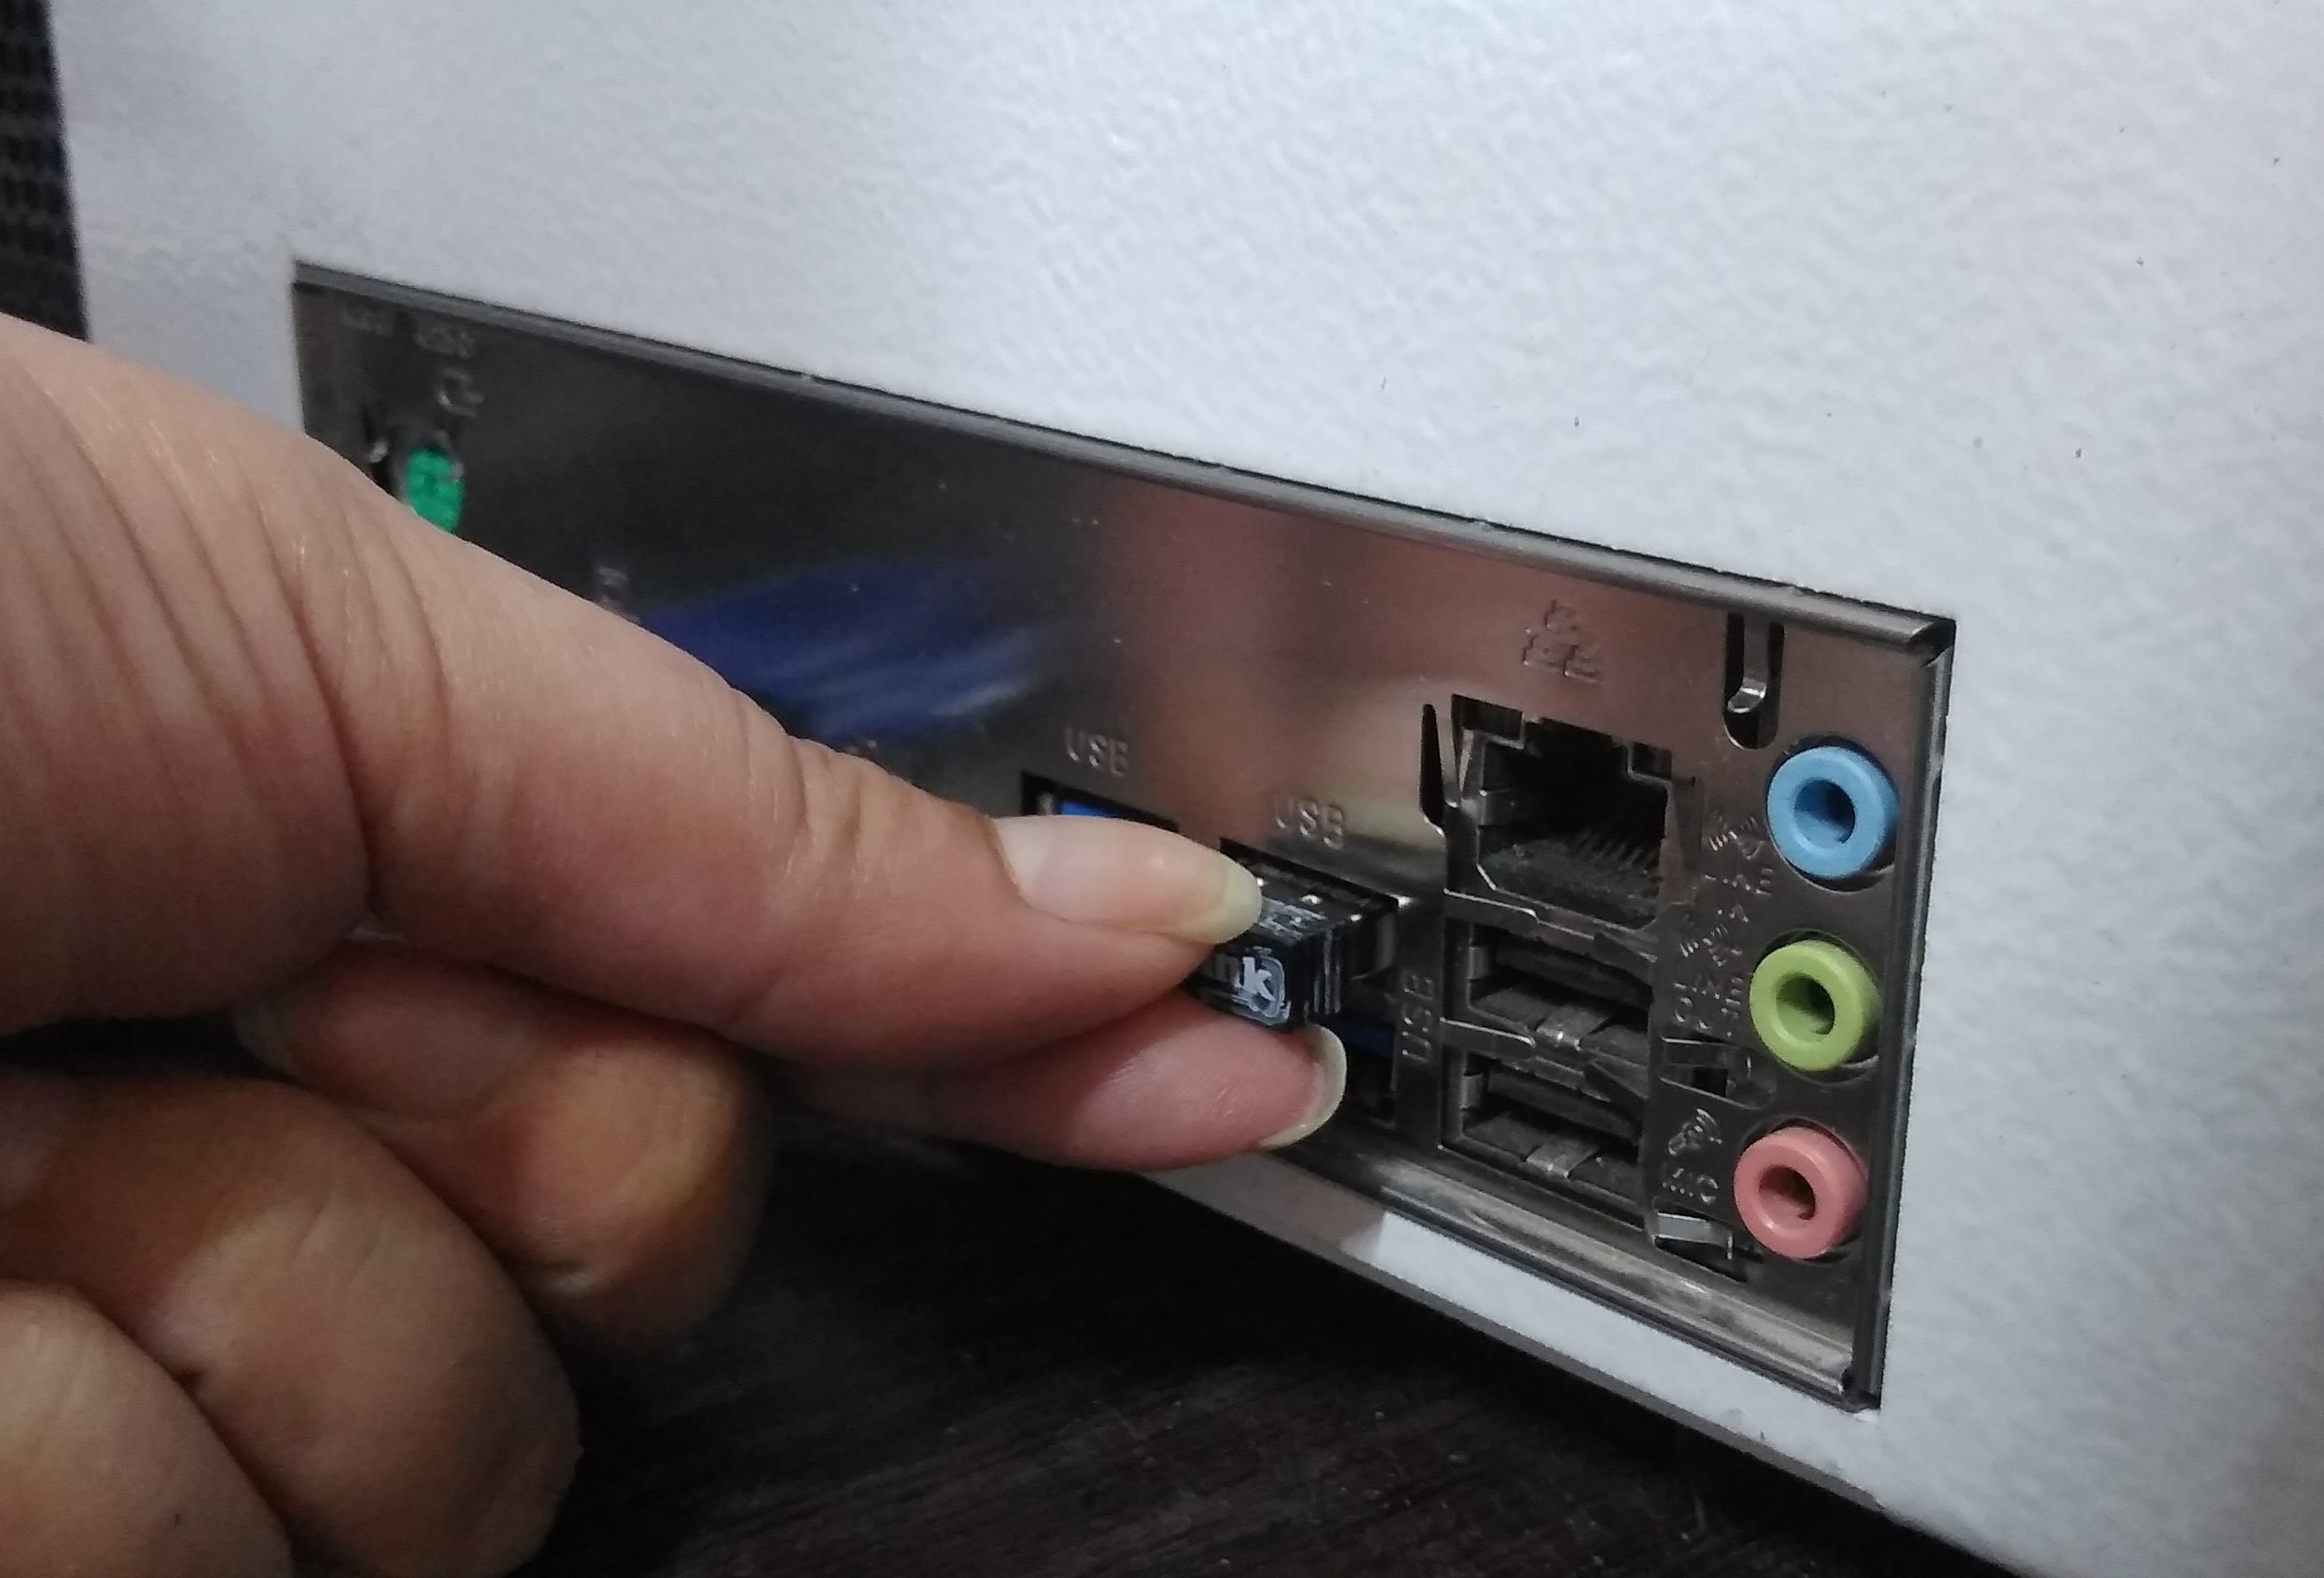
Connect the Wi-Fi module to the free USB port of your Woodver with one or with two hands.
List of models of Wi-Fi modules tested on woodver equipment in the end of the material.
STEP TWO:

Minimize the program of the saw complex by pressing the win(Cmd) or F11 button on the keyboard.
If your machine is equipped with a touch screen, put both hands on the screen and pull the picture down.
STEP THREE:
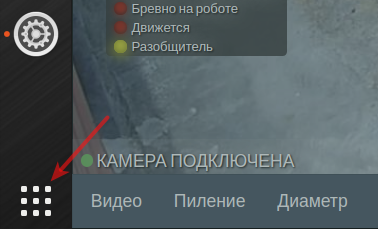
In the lower-left corner of the screen, click on the button shown in the figure."
STEP FOUR:
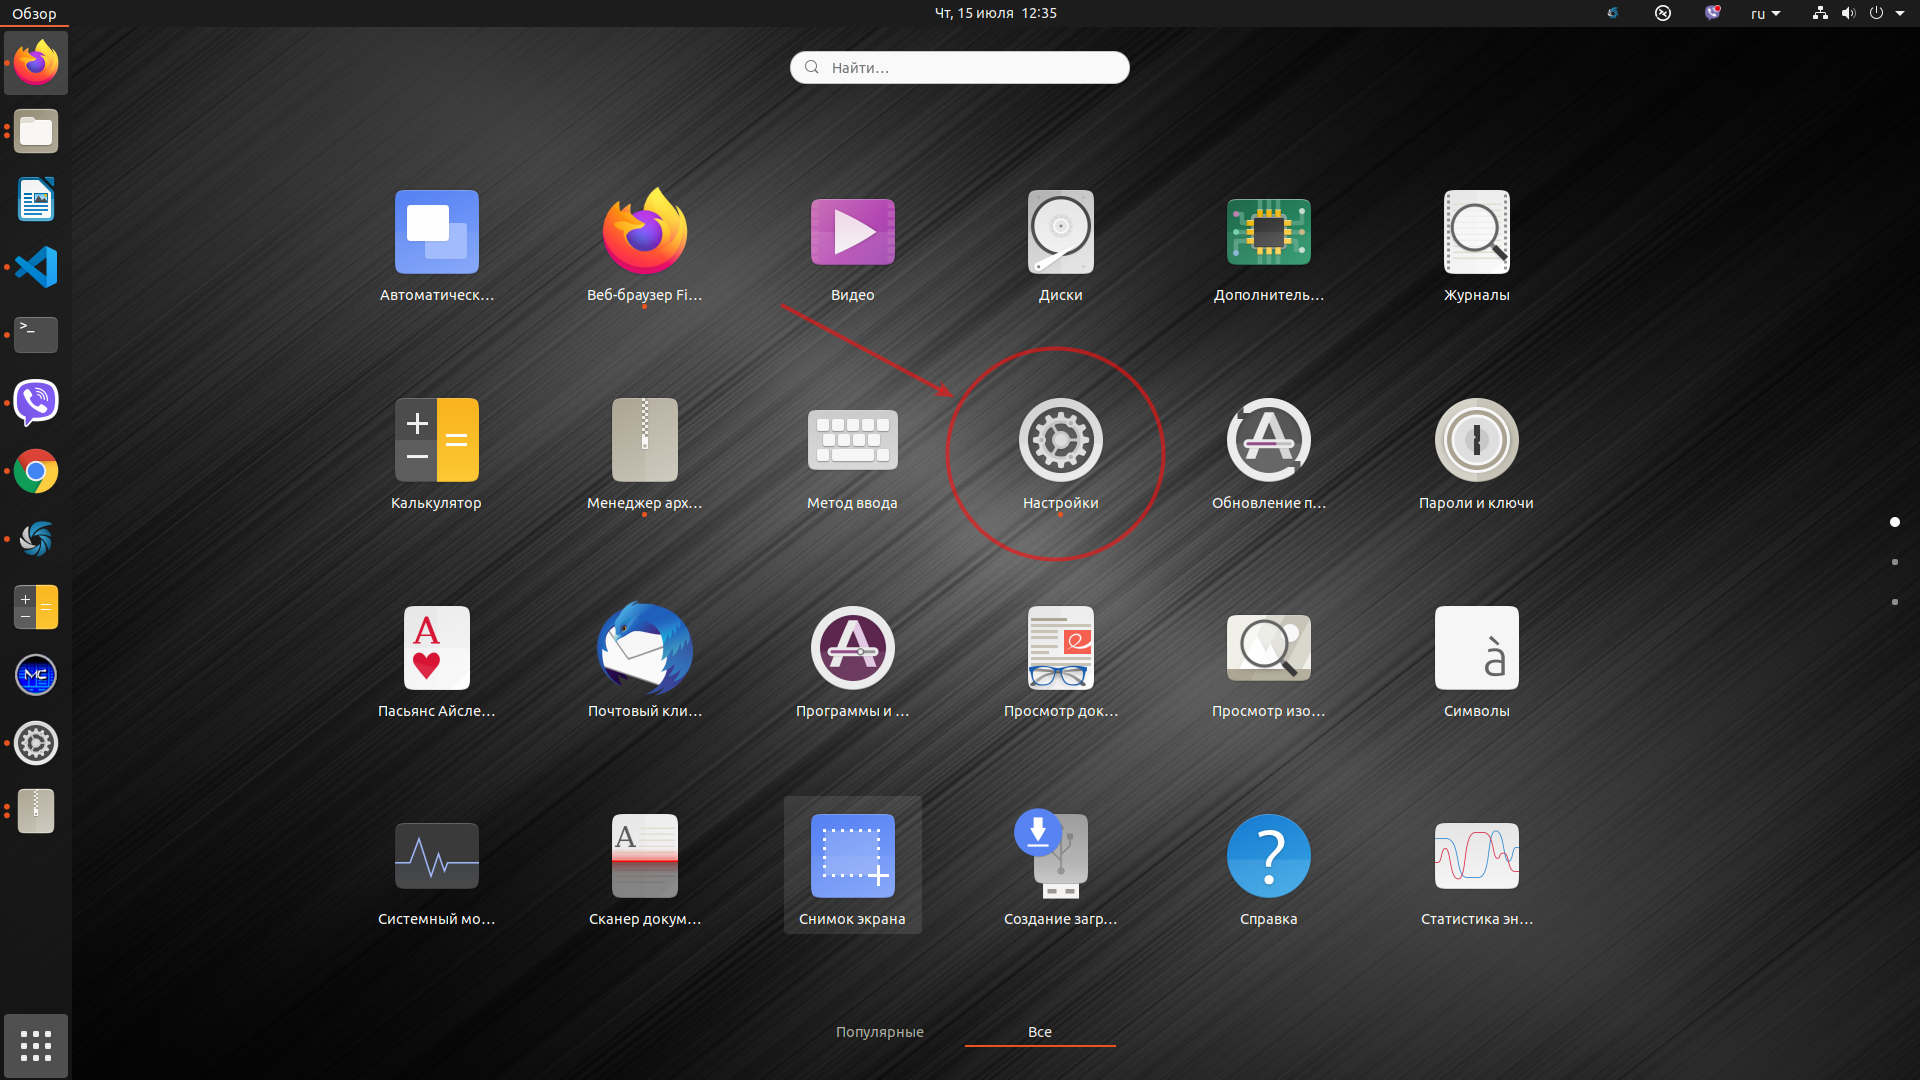
In the menu that appears, click the "Settings" icon.
STEP FIVE:
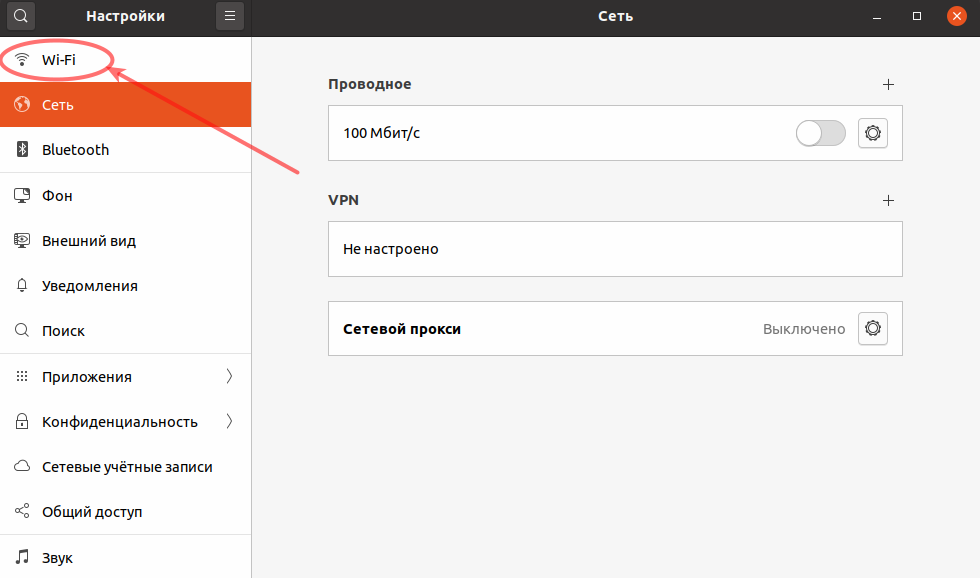
Right-click on the Wi-Fi icon at the top of the menu.
STEP SIX:
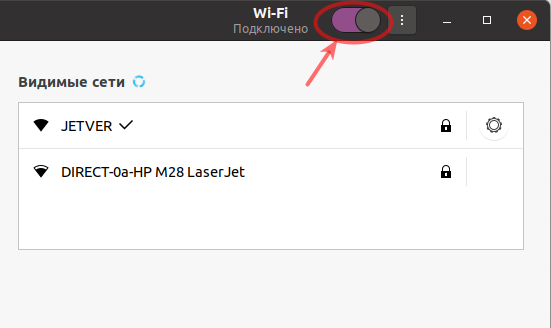
Turn the switch to "On" mode.
Turn the switch to "On" mode.
Very important! If the switch is already in the "On" position (the circle on the right) , then you do not need to click on it."
The list of available Wi-Fi networks will appear in a few seconds.
STEP SEVEN:
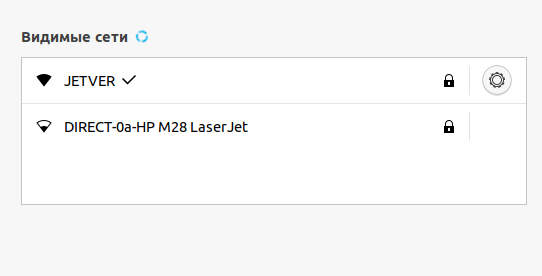
Right-click on the network you want to connect to.
STEP EIGHT:
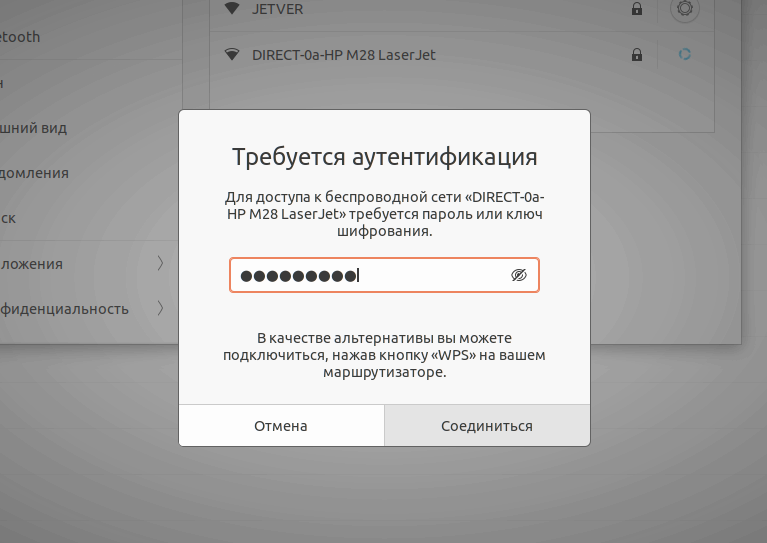
If necessary, enter the password and click connect.
If the password is entered correctly, Wi-Fi will be connected.
List of tested Wi-Fi modules: